Monday, August 20, 2012

Orange Honey Grilled Chicken Skewers with Ginger Lime Couscous

Every couple of months, some friends and I gather together for a cook-off of sorts, which we call "Cast Iron Chef Seattle."  It's our spin on the classic Iron Chef.  The theme is decided by the previous winner, and there are no restrictions other than the dish cooked must feature the "theme."  Sometimes the theme revolves around an ingredient, other times it's a style of cooking or a method of preparation. 

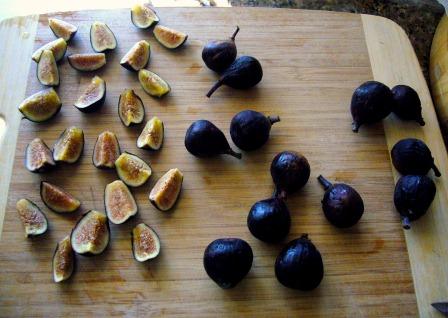
Some of the food prepared for yesterday's Cast Iron Chef Seattle, Battle: Citrus

Yesterday it was Battle: Citrus.  Now I really love to bake and make a killer lemon meringue pie, but I was determined to cook a savory dish.  I kept going back and forth in my mind, struggling to settle on what I could make.  Finally it popped in to my mind: orange honey grilled chicken on a bed of ginger lime couscous.   I decided a more summer-friendly way of prepping the chicken would be to put in on skewers, rather than grilling whole drumsticks or wings.  It's much less messy, and still good finger food for an outdoor gathering.

Me with my trophy


I guess the dish went over well.  I ended up taking first place, which was a nice surprise considering how easy this meal is to make and how I honestly didn't spend a whole lot of time planning it!  While it doesn't take much actual time in the kitchen, the prep time is greater as you're going to want to let your chicken marinate in the fridge for at least an hour before grilling.  I opted to prepare mine the night before, since I knew I had a lot going on the next day and wanted to cut back on the amount of time I'd be in the kitchen.  There are some extra perks to this method.  Marinating the chicken over night gives more time for the flavors from the spice rub to penetrate deep in to the chicken. It also allows the chicken to become extremely tender, which adds a level of texture to the meat, as once it's grilled, it will become a little tougher and crispier on the exterior.

The spice rub on this chicken is one I use regularly when I want my chicken a little sweeter.  It draws from Caribbean jerk influences, Eastern flavors, and then I throw in brown sugar for good measure.  Brown sugar adds a wonderful subtle sweetness to the meat, but more importantly is a natural meat tenderizer.  Keep this in mind the next time you've got a tough cut of beef or pork.  I also threw in the zest of one orange.  Once the chicken was rinsed, patted dry, and cut, I tossed it in a shallow bowl and generously rubbed in the mixed-up spices before tossing the chicken in a shallow baking dish and adding the juices for my marinade.  **It's important to rinse and pat dry your chicken prior to adding the rub.  You want to remove that slimy layer of chicken juice.  The rub will better adhere to the meat and the flavors will be more powerful.**

If you are grilling your chicken that day, make sure that you place your bamboo skewers in a glass of water and allow them to soak for at least an hour.  The timing is great if you're only going to marinade your meat for the minimum hour.  **Soaking the skewers keeps them from burning once they're on the grill.**  Now I chose to keep my skewers simple and hors d'oeuvres-sized, so I only put three pieces on each skewer, which I trimmed down to about 7 inches in length.  These would be really delicious if you leave the skewers full-size and alternate bits of red onion, mushrooms, and bell pepper between the chicken.  This would then function as an entree.

The couscous can be prepared in less than ten minutes.  You can begin chopping your ingredients while your grill heats, and the grain itself takes only 3-5 minutes to cook.  It is equally good served warm, cold, or at room temperature, so feel free to make this in advance or after the skewers are off of the grill.  It's all a matter of comfort and preference. 

I'm very happy with the flavor pairings of this meal, and hope you will be too.  The sweet, chewy chicken is balanced by the zest and crunch of the couscous.  Happy cooking!

Ingredients:

For the Chicken:
  • 1 lb. boneless skinless chicken breast, cut in to 1" thick pieces
  • 1 tsp. salt
  • 1 tsp. black pepper
  • 1 1/2 tsp. paprika
  • 1/2 tsp. curry powder
  • 1/2 tsp. cumin
  • 1/2 tsp. chili powder
  • 1/4 tsp. ground mustard
  • 1/2 tsp. ground ginger
  • 3 tbsp. brown sugar
  • 1 tbsp. olive oil
  • 1 1/2 tbsp. tequila
  • 1 1/2 oranges, juiced and zested
  • 1/4 cup honey
  • Bamboo wood skewers
For the Couscous:
  • 2 tsp. olive oil
  • 3/4 cup Walla Walla or other sweet onion, diced
  • 1/4 cup green bell pepper, diced
  • 1 clove garlic, minced
  • 2 tbsp. ginger, minced
  • 1 lime, juiced and zested
  • 1 1/2 cups low-sodium chicken broth
  • 1/4 tsp. salt
  • 1/4 tsp. black pepper
  • 1/2 tsp. curry powder
  • 1/4 tsp. cumin
  • 1 cup couscous
  • 1/2 cup scallions, chopped
  • 1/3 cup sliced almonds, lightly toasted
Directions:

  1. Rinse chicken and pat dry with paper towels.  On a plastic cutting board, cut the chicken in to 1" thick pieces.  Set aside.

  1. In a large, shallow bowl, combine the salt, pepper, and other spices along with the brown sugar and zest from 1 orange. Mix with finger tips until well combined.  Toss pieces of chicken in to the bowl and rub in the spices until the chicken is well-coated on all sides.  Place in a shallow baking dish.  Juice the 1 zested orange and pour evenly over the spice-rubbed chicken.  Drizzle the olive oil and tequila over the chicken.  Cover tightly in plastic wrap and place in the refrigerator for at least one hour, up to overnight.


  1. One hour before removing the chicken from the refrigerator, trim the skewers down to about 7" in length. Place the skewers in a tall glass of water to soak.  Heat grill to high heat before removing the chicken from the refrigerator.  Place 3 pieces of chicken on each of the skewers.  **See italicized note above for alternate preparation.** In a small bowl, add the zest and juice of half an orange, along with 1/4 cup of warmed honey.  Whisk until well combined.  Place the chicken on the grill, turning once the underside has grill marks.  With a basting brush, brush the honey glaze on only the cooked side of the chicken.  Continue rotating the chicken as it cooks, so that all sides may be evenly basted with the honey glaze. Remove chicken from heat on a clean plate and set aside.

  1. In a large frying pan, heat the olive oil over medium heat.  Add in the onion, bell pepper, garlic, and ginger until tender and fragrant, about 5 minutes.  Add the lime juice, chicken broth, salt, pepper, curry, and cumin.  Stir once and cover with a lid until broth begins to simmer.  Add in the couscous and cook for 3-5 minutes, until broth is absorbed and couscous is tender.  Remove from heat and fluff with fork or slotted spoon.  Add in the lime zest, scallions and almonds, and continue to fluff until well combined.  Transfer to a large serving bowl.


  1. Serve the couscous on a small plate and top with one or two of the mini-skewers, or on a large plate with a large skewer.  The couscous is good at whatever temperature, but the chicken is best warm or right off the grill.  Enjoy!

Thursday, August 16, 2012

Southwestern Quinoa Stuffed Peppers

Food is great, we know that.  But think about how much more wonderful it becomes once it's stuffed with some other element of deliciousness.  Pizza? Good.  Stuffed crust?  Even better.  French toast? Probably my favorite breakfast food.  Stuffed French toast?  Oh my.  Chicken? Fine. But Chicken Cordon Bleu? Mmmmm...  I could go on and on.

Considering the recent heat wave I'm riding out, I've been craving something with a little kick.  I don't know why, but I always want Mexican food or something spicy when it's hot out.  Enter my idea to make stuffed peppers for dinner. 

Not only is this an easy meal, it's packed with flavor AND nutrition. Unlike most stuffed peppers which rely principally on ground beef or some other meat, I've opted to use quinoa for a vegetarian-based filling.   I feel like meat-based stuffed peppers are super heavy, and well...filling.  Heavy was something I definitely wanted to avoid with the high temperatures outside.  I then added all of my favorite flavors of the southwest: black beans, diced peppers, onion, roasted corn, lime, and topped it all off with some tequila and smokiness. **The version I prepared for this recipe also utilized some leftover rotisserie chicken from a couple days ago that I shredded.  It was a great addition, but absolutely not a necessity in preparing this dinner.**

Don't be discouraged by the list of ingredients; this recipe can be easily modified to fit your needs and palette. Also, unless you're extremely sensitive to spice, don't shy away from the amounts used.  The method in which this is prepared, along with the combination of cheese and sour cream, keeps the spicy levels down.  You'll get the flavor without getting the burn!

You'll see that this recipe calls for 6 red bell peppers.  As you can tell from my pictures, I used 4:  two red, one yellow, one orange.  Well, I ran out of red but no worries, since any color pepper works just fine.  It's all a matter of preference and presentation.  Also, the recipe does make enough filling for 6 peppers.  It's not that I ran out of peppers altogether.  I just really like saving the extra filling and re-using it later on for tacos or as a topping on nachos.  :-)

I hope you find this dish to be a fun option for a hot summer day.  To really savor the meal, try pairing it with a margarita or some sangria!  Enjoy!

Ingredients:
  • 1 cup red quinoa: rinsed, drained, and patted dry
  • 1 tsp. extra virgin olive oil
  • 1 clove garlic, minced
  • 1/2 yellow onion, diced
  • 2 jalapenos, seeded and finely diced (or leave in the seeds for a little extra spice)
  • 1/2 green bell pepper, finely diced
  • 1 lime, juiced and zested
  • 1/4 tsp. paprika
  • 1/4 tsp. cumin
  • 1/2 tsp. black pepper
  • 1/2 tsp. sea salt
  • 2 tbsp. gold tequila
  • 1 (14 oz.) can low-sodium veggie or chicken broth
  • 1/4 tsp. liquid smoke

  • 1/2 cup low-sodium black beans, rinsed and drained
  • 1/2 cup roasted corn
  • 1/3 cup packed cilantro, chopped
  • 2 tbsp. light sour cream
  • 4 oz. queso fresco, crumbled (finely shredded cheddar cheese/ Mexican cheese blend is another option)
  • 4 oz. shredded chicken (optional)
  • 2 tsp. Chipotle flavored hot sauce (optional - I used Chipotle Tabasco)
  • 6 large red bell peppers
Directions:


1.  While the quinoa is draining, over medium heat, add olive oil to a large frying pan with a lid.  Add the garlic, onion, jalapenos, and chopped bell pepper.  Stir until coated in the oil, and allow to soften for 2-3 minutes, until fragrant. Add the quinoa and toss gently to evenly mix.  Season the quinoa with the lime zest, paprika, cumin, black pepper, and sea salt.  Stir gently so that the seasonings are evenly distributed and allow the quinoa to lightly brown, about 5 minutes.


2.  Add the lime juice and then the tequila.  Stir quickly so that all of the tequila mixes with the quinoa before the alcohol cooks out.  Add the broth and the liquid smoke. Stir the pan a couple of times so that everything is well mixed.  Reduce the heat to low. Cover the pan with the lid and let cook undisturbed for 15 minutes.

3.  In the mean time, add the black beans, corn, cilantro, sour cream, cheese, plus the chicken and hot sauce (if using) to a large heatproof bowl.  **Roasting the corn isn't necessary, but it adds a little extra flavor.  If roasting, carefully place an ear of corn over an open flame or grill, or place frozen/canned corn in the oven and lightly bake at  ̊350 F until jusy slightly browned.**


    4.  When the quinoa is done cooking, remove the lid.  Lightly fluff with a fork and keep on low heat until all the excess liquid has evaporated.  At this point, position a rack in the middle of your oven and preheat to 375 ̊ F. 

    5.  While the quinoa is still hot, add it to the mixing bowl.  Gently stir all of the ingredients until well mixed, taking care not to mash the beans or corn.  The cheese will begin to melt and the filling will appear somewhat creamy.


    6.  Carefully cut around the tops of the red bell peppers and pull off the top.  Remove any large excess portions of white from the inside of the pepper.  Lay the removed top on its side and cut off the seedy part.  Gently use a spoon to stuff the pepper, pressing down to ensure the filling is evenly packed.  Place the top of the pepper back on.  Transfer to the casserole dish.  Repeat for all peppers.


    7.  Place the casserole dish in the oven and bake until the peppers are very soft and slightly charred on top, about 25 minutes.  Remove from oven and allow to cool 5-10 minutes before serving.  Serve with tongs as peppers will still be very hot.


      Thursday, August 9, 2012

      Sweet Fig Galette with Peaches and Blackberries


      Ingredients:
      Master Fig Galette Recipe

      For the filling
      • 18 fresh black figs, stemmed and quartered lengthwise (should yield about 2 cups)
      • 1 cup fresh blackberries, rinsed and drained
      • 1 large yellow peach, chopped in to 1/2" chunks
      • 1/2 tsp. almond extract
      • 1/4 tsp. ground ginger
      • 2 tbsp. firmly packed brown sugar
      • 1/2 tsp. grated lemon zest
      • Butter flavored cooking spray
      • 2 tbsp. granulated sugar, for dusting
      Directions
      1. Prepare all of your fruit and place in a medium sized mixing bowl.  Add in the rest of the filling ingredients.  Stir gently with a spoon or spatula until all the ingredients are well mixed, taking care not to break apart the blackberries.  Set aside and allow the sugar to dissolve for 10 minutes.

      • Meanwhile, preheat the oven to 400 ̊ F. Roll out your galette dough from the Master Fig Galette Recipe and place on baking stone or baking sheet. If using baking stone, lightly dust with cornmeal first.
      • Spoon the filling ingredients on the to center of the rolled out dough, and spread the filling so that it extends across the dough, but leaves a 1 1/2" border. Fold the border over the filling, so that there is overlap.  Lightly spritz the cooking spray along the folded border. Sprinkle 1 tbsp. of the granulated sugar along the sprayed surface, and the other 1 tbsp. along the top of the fruit filling.


      • Place the galette in the oven and bake for 30 minutes, until crust is lightly crispy and golden brown. Allow to cool for 5 minutes before cutting in to slices with a pizza cutter. Serve warm.

      Savory Fig Galette with Caramelized Onions, Goat Cheese, and Prosciutto


      Ingredients:
      Master Fig Galette Recipe

      For the filling
      • 18 fresh black figs, stemmed and quartered lengthwise (should yield about 2 cups)
      • 1/2 small yellow onion, thinly sliced
      • 1 tbsp. unsalted butter
      • 1/2 cup crumbled goat cheese (gorgonzola can be a great substitute)
      • 4 oz. thinly sliced prosciutto, cut in to 1" pieces
      • 1 tsp. extra virgin olive oil
      • 1/2 tsp. coarsely ground black pepper
      • 1 tsp. dried rosemary
      • 1 tsp. drief oregano
      • 1/2 cup fresh arugla
      1. Prepare and set aside your figs.  In a medium skillet, melt the butter over medium heat.  Add the onions and cook for 5 minutes or until soft and transluscent, stirring occassionally.  Remove from heat and set aside.

      • Preheat the oven to 400 ̊ F.  Roll out your galette dough from the Master Fig Galette Recipe and place on baking stone or baking sheet.  If using baking stone, lightly dust with cornmeal first.
      • Drizzle the center of the dough with the extra virgin olive oil.  Spread evenly.
      • Begin layering the filling ingredients.  Sprinkle 1/4 of the goat cheese directly on the dough in very small crumbles.  Add the figs, then the onions, then the prosciutto, and then the remainder of the goat cheese.  Season evenly with the pepper, rosemary, and oregano.  Spread the filling so that it extends across the dough, but leave a 1 1/2" border.  Fold the border over the filling, so that there is overlap.

      • Place the galette in the oven and bake for 30 minutes, until crust is lightly crispy and golden brown.  Allow to cool for 5 minutes and top with the fresh arugula.  Use a pizza cutter to slice in to individual servings. Serve warm.

      Monday, August 6, 2012

      Gone Bananas! Monkey Bread

      Mmm...monkey bread.  This guilty pleasure is not only good with coffee in the morning, but is equally delectable at any time of day.  But why do they call it monkey bread? Seriously.  I've wondered about this every time I see that special monkey bread dish at Williams-Sonoma, or hear someone talking about how much they crave it on The Biggest Loser or some other tv show.  I guess I could look it up, but as far as I'm concerned, if the answer's not readily apparent, it doesn't make a whole lot of sense as a recipe name. 


      I've decided to rectify this dilemma by making a version of this nummy treat that does pay homage to the cute little primate - at least in an obvious kind of way.  No big changes here, but I thought the addition of bananas was necessary.  True to form, this interpretation incorporates my favorite way to flavor bananas: with a healthy dose of cinnamon, brown sugar, vanilla, and rum. On TOP of all the brown sugar and cinnamon already in the monkey bread itself.  Oh yeah.

      I've also elected to stray from the traditional monkey breads I've become accustomed to, which are typically prepared using Pillsbury Grands Buttermilk Biscuits.  Not that there's anything wrong with shortcuts - I just prefer things as homemade as possible.  This assures better quality control, with the added bonus of keeping out all the extra gunk that I can't pronounce.  Here, I've opted to make a cinnamon bun inspired dough with buttermilk rather than just milk in the dough.  Like I mentioned, there's nothing wrong with the shortcut (which I just gave you!), but trust me when I say making the entire confection from scratch is really the way to go.  Whichever you choose, get your taste buds ready because this is one treat where skipping on seconds is not an easy feat!


      Ingredients:

      For the dough
      • 3/4 cup buttermilk, warmed to about 115  ̊ F
      • 1/4 cup milk, warmed to about 115 ̊ F
      • 1 packet (2 1/2 tsp) active dry yeast
      • 3 large eggs, at room temperature
      • 1/4 cup granulated sugar, plus 1 tsp. reserved for proofing
      • 2 tsp. sea salt
      • 4 1/2 cups all-purpose flour
      • 1 tsp. cinnamon
      • 6 tbsp. unsalted butter, at room temperature
      • Canola oil, for greasing the bowl
      For assembling the dough balls
      • 3/4 cup granulated sugar
      • 3/4 cup firmly packed brown sugar (light or dark is fine)
      • 1 1/2 tbsp. cinnamon
      • 1 tsp. nutmeg
      • 3 tbsp. milk
      • 2 tbsp. melted butter
      • 1 cup pecans, coarsely chopped and toasted
      For the "cinnarum-glaze" and banana topping
      • 2 tbsp. milk
      • 2 tbsp. unsalted butter
      • 2 tsp. brown sugar
      • 1/2 tsp. cinnamon
      • 1 tsp. vanilla
      • 1 tsp. spiced rum
      • 1/2 cup confectioner's sugar
      • 1 1/2 bananas, sliced in to thin disks
      1. To prepare your dough
        • Pour the buttermilk and milk in a heatproof bowl and heat in the microwave until the mixture is just warm to touch.  (I don't recommend doing this on the stove top, since metal hinders how your yeast will proof.)  Sprinkle the yeast over the milk, add the 1 tsp. of sugar, and stir slightly with your finger.  Allow to proof for 2 minutes, until the yeast becomes soft and some foamy bubbles form.  Whisk the milk mixture until all the yeast dissolves - it should look a little more foamy but don't worry if it's not as foamy as proofing for other breads.  Whisk in the eggs, the rest of the granulated sugar, and the salt until all is dissolved.  Add 2 cups of the flour and the cinnamon, and stir with a wooden spoon until mostly moistened. 
        • Transfer the mixture to a stand mixer fitted with the dough-hook attachment.  Add the butter (cut in to chunks), and start kneading the dough on medium-low speed.  Begin adding the remaining flour 1/2 cup at a time, stopping the mixer after each addition to scrape down the sides of the bowl - this will keep your dough smooth and elastic, since the flour will be added evenly.  Continue kneading until the dough begins to pull away from the sides of the bowl, reducing the speed to low.  **Be careful not to add too much flour to the dough, or it will become tough.**  The dough will be slightly sticky, but will become less so with more kneading.  Allow the mixer to run for 5-7 minutes, and if the dough is not ready yet, with floured hands, continue to knead for another 2-3 minutes. 
        • Gather the dough in to an evenly rolled ball, and transfer to a large, lightly oiled bowl.  Rotate it in the bowl so it is coated entirely in the oil.  Cover with a slightly dampened kitchen towel or plastic wrap. Let rise in a warm, draft-free spot for 1 1/2 hours, or until doubled in size.

        • Just before your dough is fully risen, begin preparing your ingredients for coating the dough balls and assembling the monkey bread. 
      • To assemble the monkey bread - you'll need a bundt pan, coated generously with butter-flavored cooking spray
        • Use a fork to mix the granulated sugar, brown sugar, cinnamon, and nutmeg in a bowl.  Coarsely chop the pecans, and toast until lightly golden and aromatic, about 5 minutes.  Melt the butter in a small bowl, add the milk, and stir until well combined.
        • On a lightly floured work surface, lay the dough and pat in to a flat rectangle.  With a sharp knife, cut the dough in half, cut each half in half, and so on until you have 8 strips.  Separate the strips, and one at a time, begin rolling out with your hands until long, thin ropes form.  They should be about 3/4" diameter.  Cut each rope in to 1" long segments.  Continue this until you have several dozen little dough cubes.


        • One by one, take your dough cubes and lightly dip in the milky butter.  The dough should be moistened just well enough for the cinnamon sugar to stick, but NOT wet and soggy.  Eek.  Transfer your moistened dough cube to your bowl with the cinnamon sugar and roll until evenly coated. **I personally like these first several to get a slightly thicker coating of the cinnamon sugar because these are the pieces that will end up on the top of the finished product.**  As you complete each dough ball, place in the bottom of the prepared bundt pan.  Continue this process until you have assembled a single, even layer. Make sure you press the dough balls firmly but gently together. Sprinkle with 1/3 of the toasted pecans. 

        • Begin the next layer of dough cubes just as before.  After this layer is complete, sprinkle with the remaining pecans.  Finish by adding one more layer of the coated dough balls.  As you complete this last layer, the bundt pan should be just over half-way full.  **Don't worry about squeezing in all the dough, if you have any remaining.  You can go ahead and bake these by themselves on a baking sheet at 350 ̊ F for 12 minutes.**

        • Let the assembled monkey bread rise once again in a warm, draft-free spot for 30 minutes.  As the monkey bread rises, pre-heat your oven to 350 ̊ F and place a rack in the middle.  Place the pan in the oven and bake for about 25 minutes, until well-risen and golden brown.  Allow the baked monkey bread to cool in the pan on a wire cooling rack for 5 minutes.  

        • Center a large plate or cake dish over the bundt pan, and carefully invert (using hot pads or oven mitts!).  The monkey bread may be a little stubborn, so gently jiggle the bundt pan until it drops on to the plate.

      • To make the topping
        • While the monkey bread is still cooling, thinly slice your bananas. Set aside.
        • In a medium saucepan, heat the milk and butter on the stove over medium-low heat until all the butter is melted.  Add in the brown sugar and cinnamon, and whisk until the sugar melts.  Increase the stove to medium heat.  Add the vanilla and rum, and continue whisking slowly for 1 minute, until the alcohol cooks out.  Add half  of the confectioner's sugar, whisking until the sugars starts to dissolve and the mixture begins to thicken. Add the other half and whisk until fully dissolved.  Remove from heat immediately.

        • Add the bananas in three rings around the top of the monkey bread, placing the slices so that they slightly overlap. It will take a few minutes to do this, which is fine as it will give the glaze a little time to set up.  Drizzle the glaze slowly and evenly over the entire monkey bread, focusing on coating the banana slices (this will act to preserve them, so that they do not brown).


      • This dish need not be eaten right away, but is best served warm. So get your APE-atite ready, heat before serving, and go bananas!!! Har dee har har...sorry. :-)

      Saturday, August 4, 2012

      Mango Coconut Crumble

      In honor of hot weather FINALLY arriving in the Pacific Northwest, I'm kicking off my blog with a take on one of my favorite desserts: a fruit crisp.  Here, I've decided to go with a mango coconut crumble since I absolutely adore this fruit and the combination of these tropical flavors just scream summer.  When paired with a light ice cream or sorbet, it's the perfect treat for a warm evening. 


      When choosing mangoes at the store, go for the fruits that are rounder rather than those that look flat and disk-shaped.  Mangoes with this fuller body have a more firm, less stringy internal consistency.  Additionally, they will be easier to handle when peeling and chopping around that oh-so-awkward pit.  The mangoes you select should ideally be more reddish, and fairly firm to touch.  Avoid any that are soft or squishy.  While you only want to eat fully ripened mangoes, it is best to buy them while mostly firm and then let them continue to ripen on your counter for a couple of days.  You'll know the mangoes are ripe when they give a little more to your fingertips as you gently squeeze. Be careful not to let your mangoes over-ripen; they will be much more difficult to peel and can quickly turn in to a juicy mess.  This recipe works best if the fruit is firm enough to chop in to cubes.  It will cook down and become soft and juicy once it's in the oven.


      As you go to peel your mango, a Y-peeler can be extremely useful.  However, depending on how much ripening your mango did since you brought it home, you may find it's actually easier to get started with the peeler, and then continue to pull the skin away from the flesh by hand.  Do this slowly and carefully to avoid pulling the flesh off with the skin. 

      Ingredients:
      For the Filling
      • 4 ripe mangoes
      • 1/3 cup granulated sugar
      • 1/2 tsp. cinnamon
      For the Crumble Topping
      • 1 cup all-purpose flour
      • 1/2 cup old-fashioned rolled oats
      • 1/3 cup granulated sugar
      • 1/3 cup firmly packed dark brown sugar (golden will work too, but I like the richness of the dark for this recipe)
      • 1/2 tsp. cinnamon
      • 1/4 tsp. ginger
      • Dash allspice
      • 1/4 tsp. salt
      • 1/2 cup shredded coconut, toasted
      • 1/2 cup unsalted butter, melted
      • 1/2 tsp. vanilla
      • 1/4 tsp. coconut extract (optional, for that added punch of coconut)
      Directions
      1. Preheat oven to 350 ̊ F.  Have ready a 9x13" baking dish.  No need to grease.


      2. To make your filling, peel and chop your mangoes in to 1/2" cubes.  Place mango chunks directly in the baking dish, spreading evenly. Sprinkle the mango chunks with 1/3 cup granulated sugar and 1/2 tsp. cinnamon.  Mix with your hands or a wooden spoon until thoroughly combined.


      3. Use a large bowl the make the topping.  In the bowl, stir together the flour, oats, sugars, spices, and salt.  Meanwhile, lay the coconut on a foil lined baking sheet and toast in the pre-heated oven for about 5 minutes, or until dry and toasty.  It should be light brown.  Keep an eye on it, and shake the pan every couple of minutes to prevent from sticking and burning.  Toss the toasted coconut in to the bowl with the flour mixture.  Stir all ingredients again, until well mixed.  Add the melted butter, vanilla, and coconut extract (if using).  Mix until large moist crumbs form.


      4. Spoon the crumble topping evenly over the mangoes resting in the baking dish.


      5. Place the prepared dish in the oven and bake until the filling begins to bubble and the top appears a crispy golden brown, about 35-40 minutes.


      6. Allow to cool just slightly, for 5 or so minutes.  This dish is best served warm and as an ice cream topping.  My personal choice was a banana caramel ice cream - yum!  
      7. Enjoy!